

How To Get A Custom Skin In Minecraft Windows 10
I of the coolest parts of Minecraft: Windows 10 Edition is the ability to upload a custom skin for your thespian. These skins tin be created by y'all, or they can be chosen from a listing of pre-made designs.
Here'due south how to swap out the stock player peel with a custom skin of your choice!
- How to create your ain skin
- How to download a premade skin
- How to upload a skin into Minecraft
How to create your own skin
The website minecraftskins.com has an excellent skin editor you can use to make whatever peel you lot desire.
- Launch your favorite web browser from your Start bill of fare, desktop, or taskbar.
- Navigate to world wide web.minecraftskins.com/skin-editor/.
-
Click a colour from the color cycle.
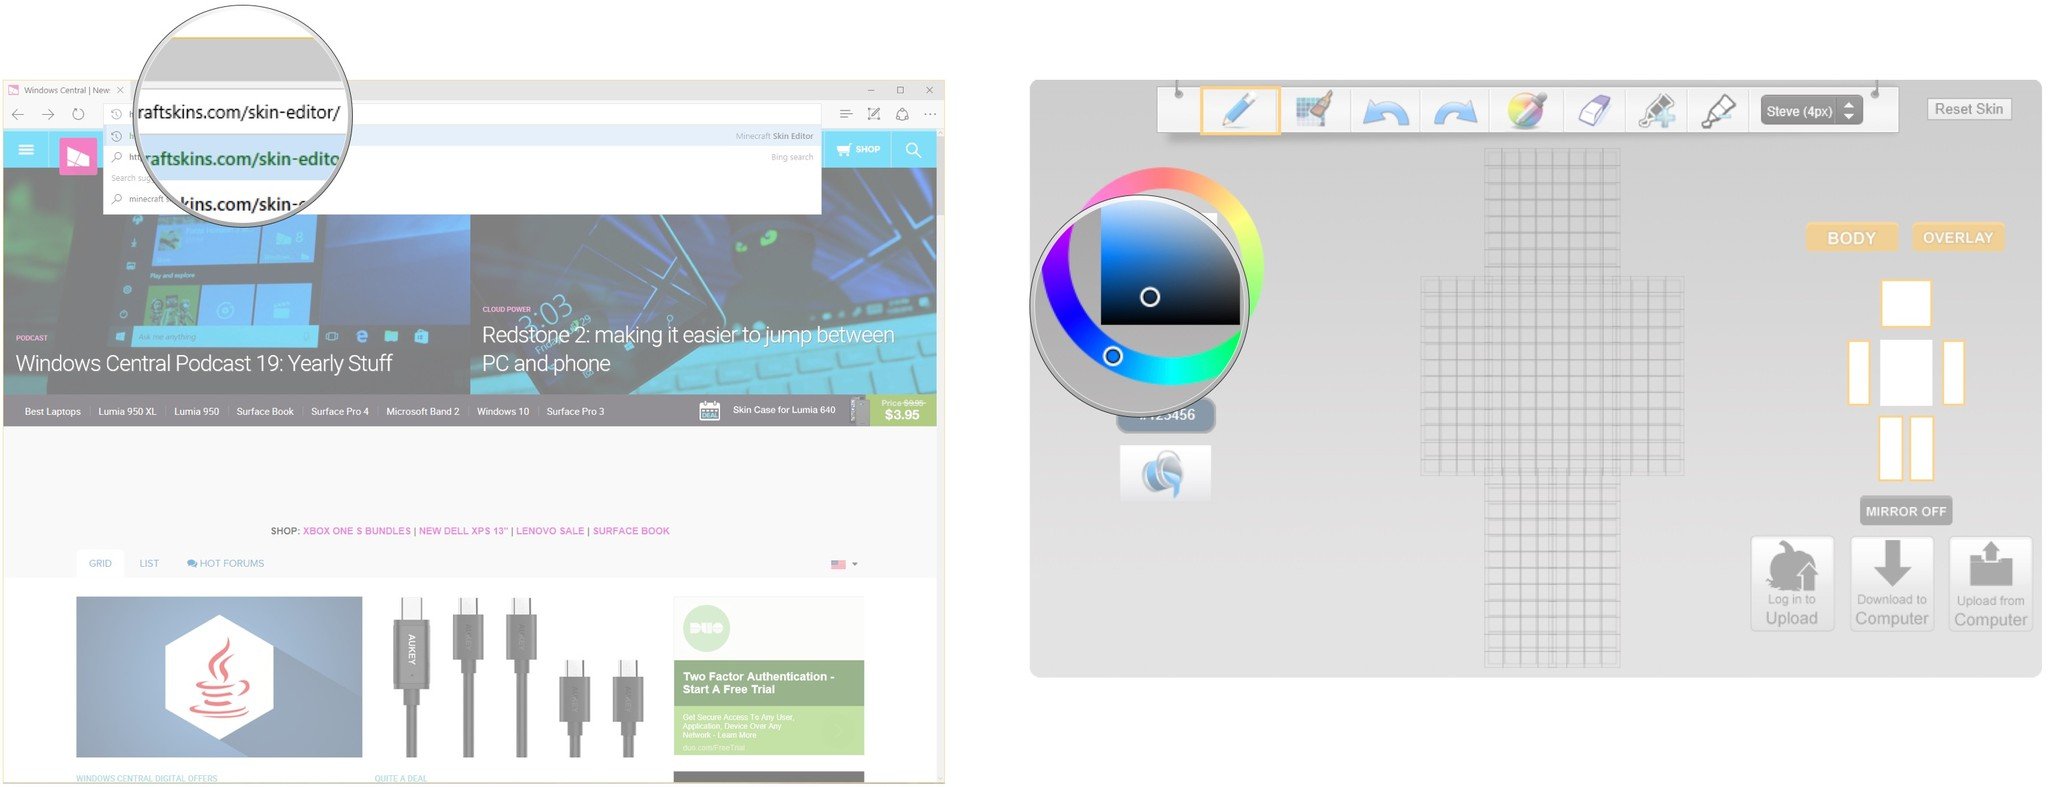
- Click squares on the player model to utilize the colour.
-
Click the eraser button.

- Click whatever colored squares you desire to erase.
-
Click and drag a blank infinite beside the model to rotate information technology.

- Click the Download to Computer button when y'all're happy with your skin.
- Click Save.


How to download a pre-made skin
The website minecraftskins.com hosts a ton of skins fabricated by other fans of Minecraft — you can download them and upload them into Minecraft. Hither's how to download a premade pare.
- Launch your favorite web browser from the Offset menu, desktop, or taskbar.
- Navigate to www.minecraftskins.com.
-
Click a peel that interest you. In this case, we choose Turtle.
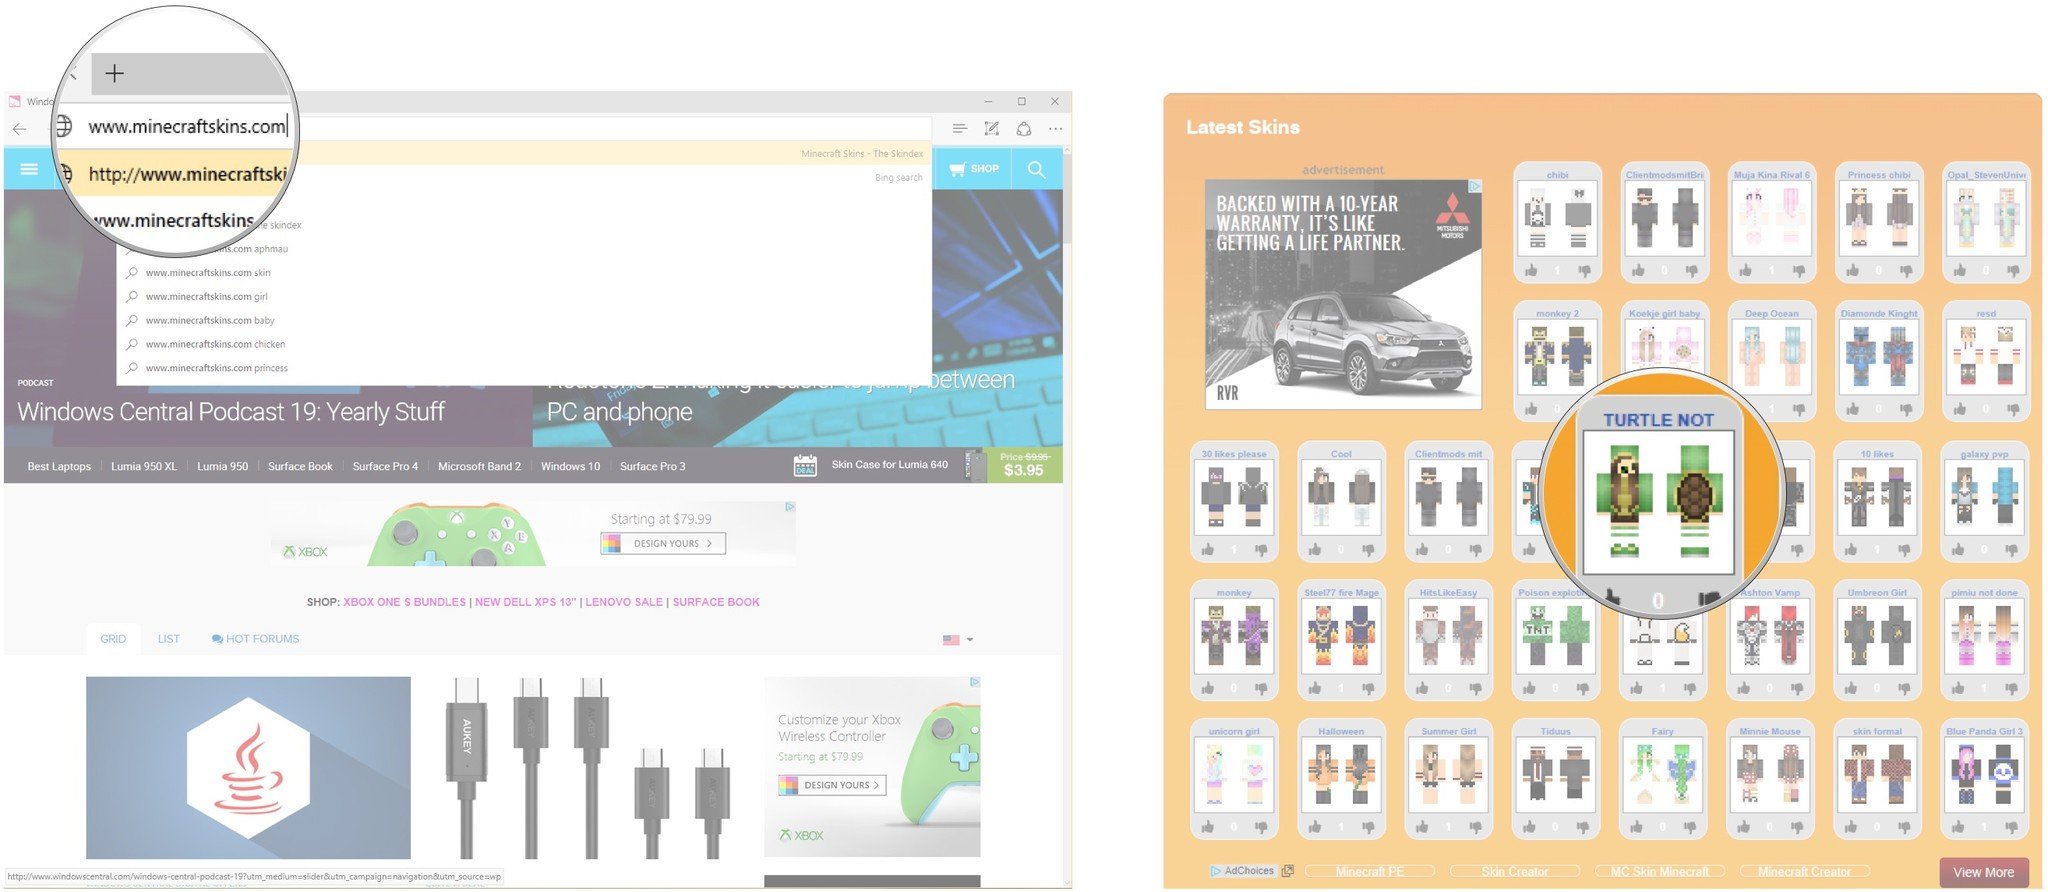
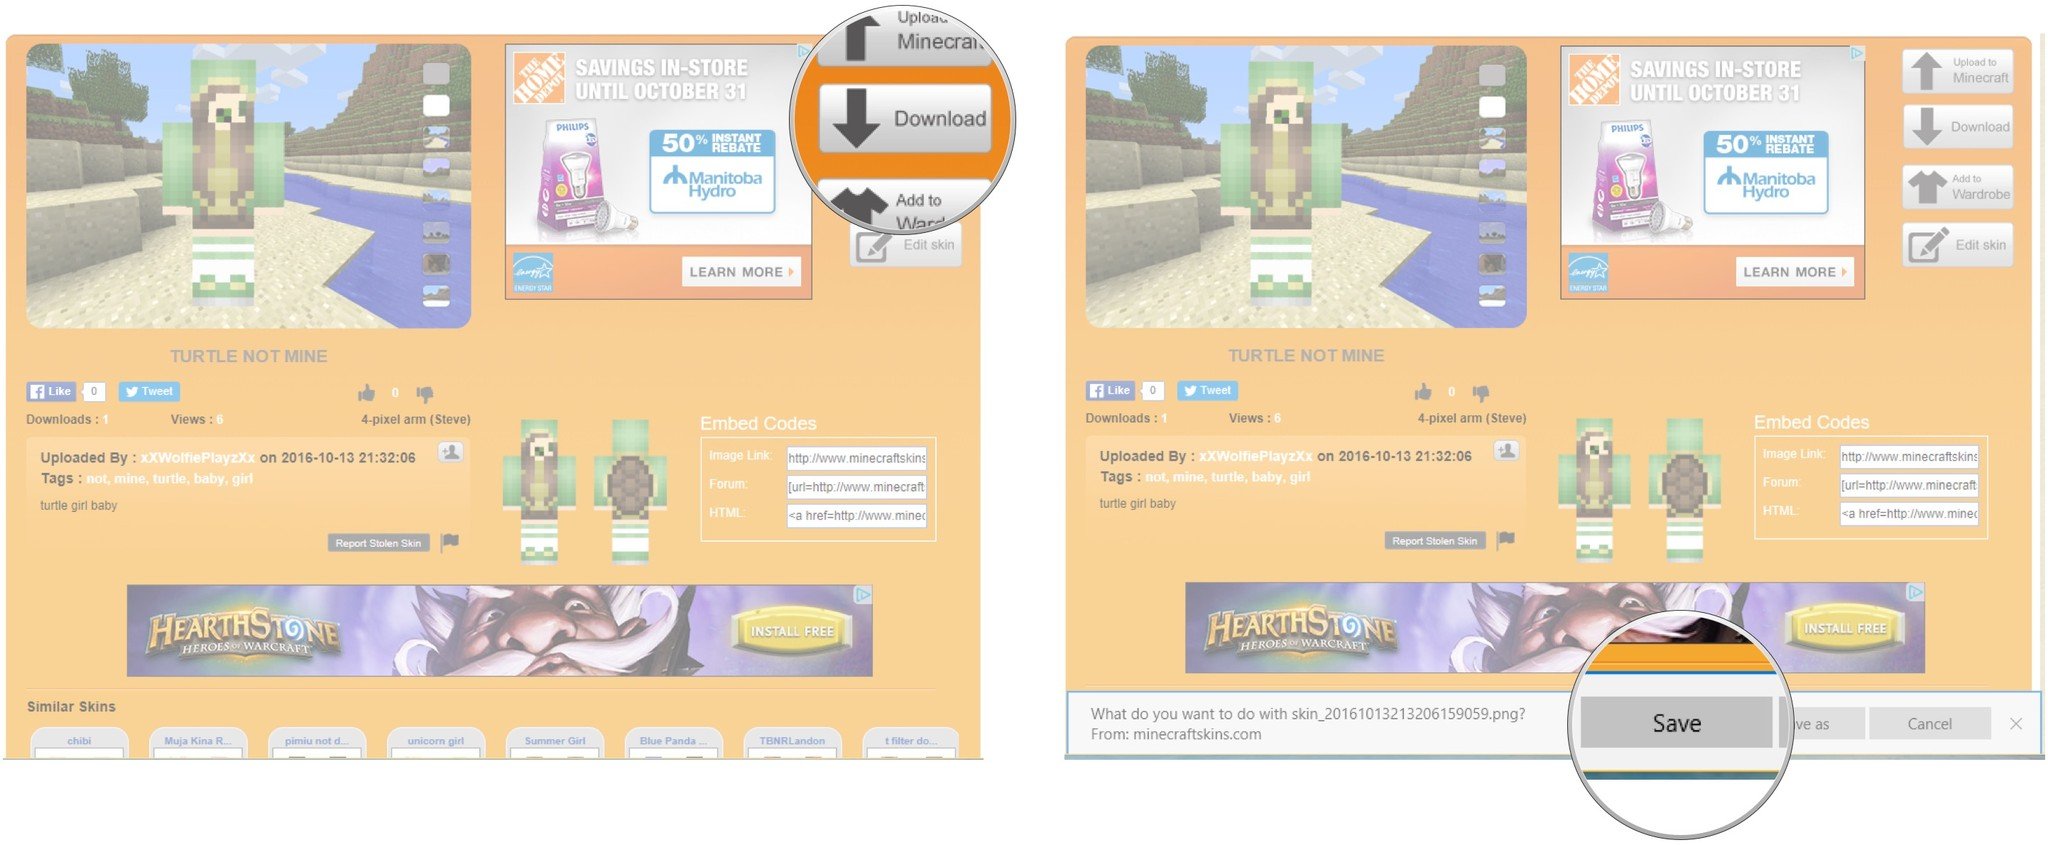
- Click the Download push. Make sure the file yous're downloading is a PNG file.
-
Click Save. The pare volition be, past default, saved to your Downloads folder.


How to upload a skin into Minecraft
Now that you've either created a new skin or downloaded a pre-fabricated skin, you tin can upload information technology into Minecraft.
- Launch Minecraft: Windows 10 Edition from your desktop, Outset menu, or taskbar.
- Click the hanger button located beneath your character's avatar.
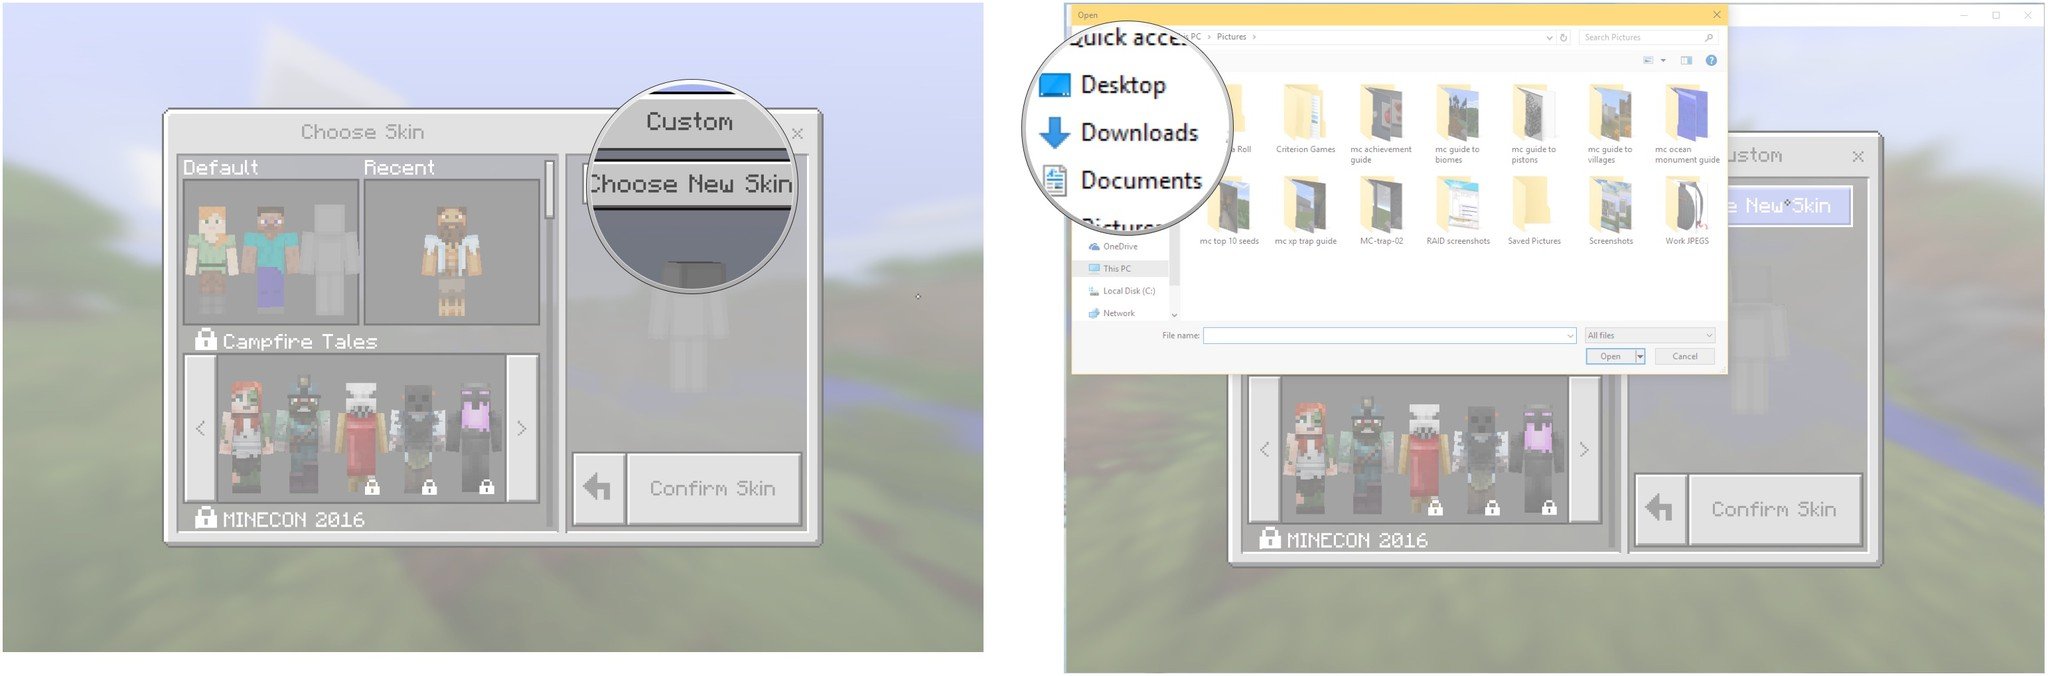
-
Click the bare model below the Default field.
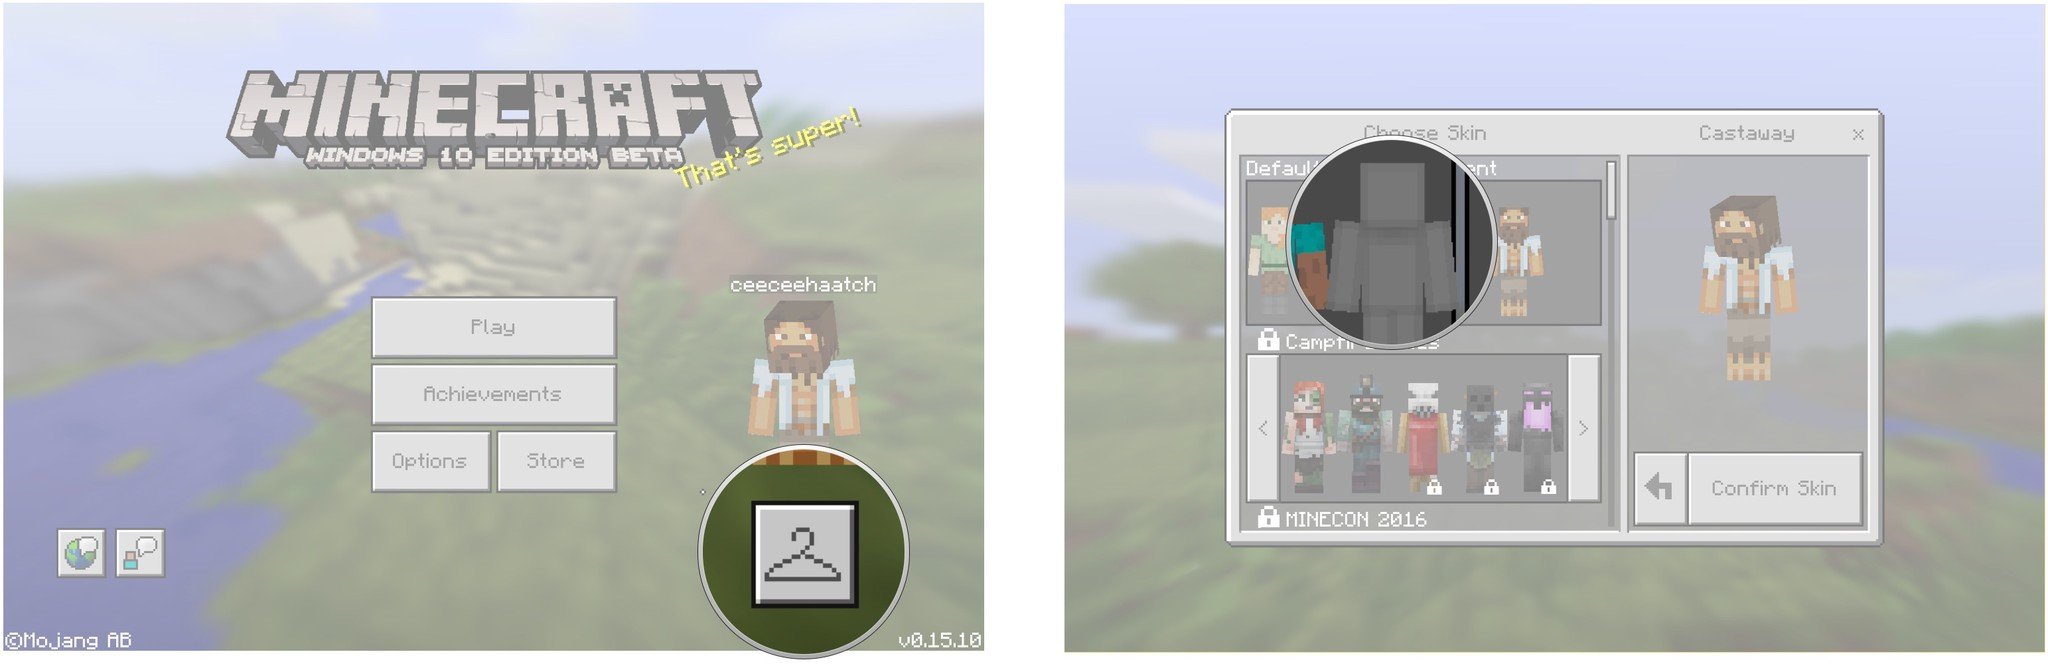
- Click Cull New Skin.
-
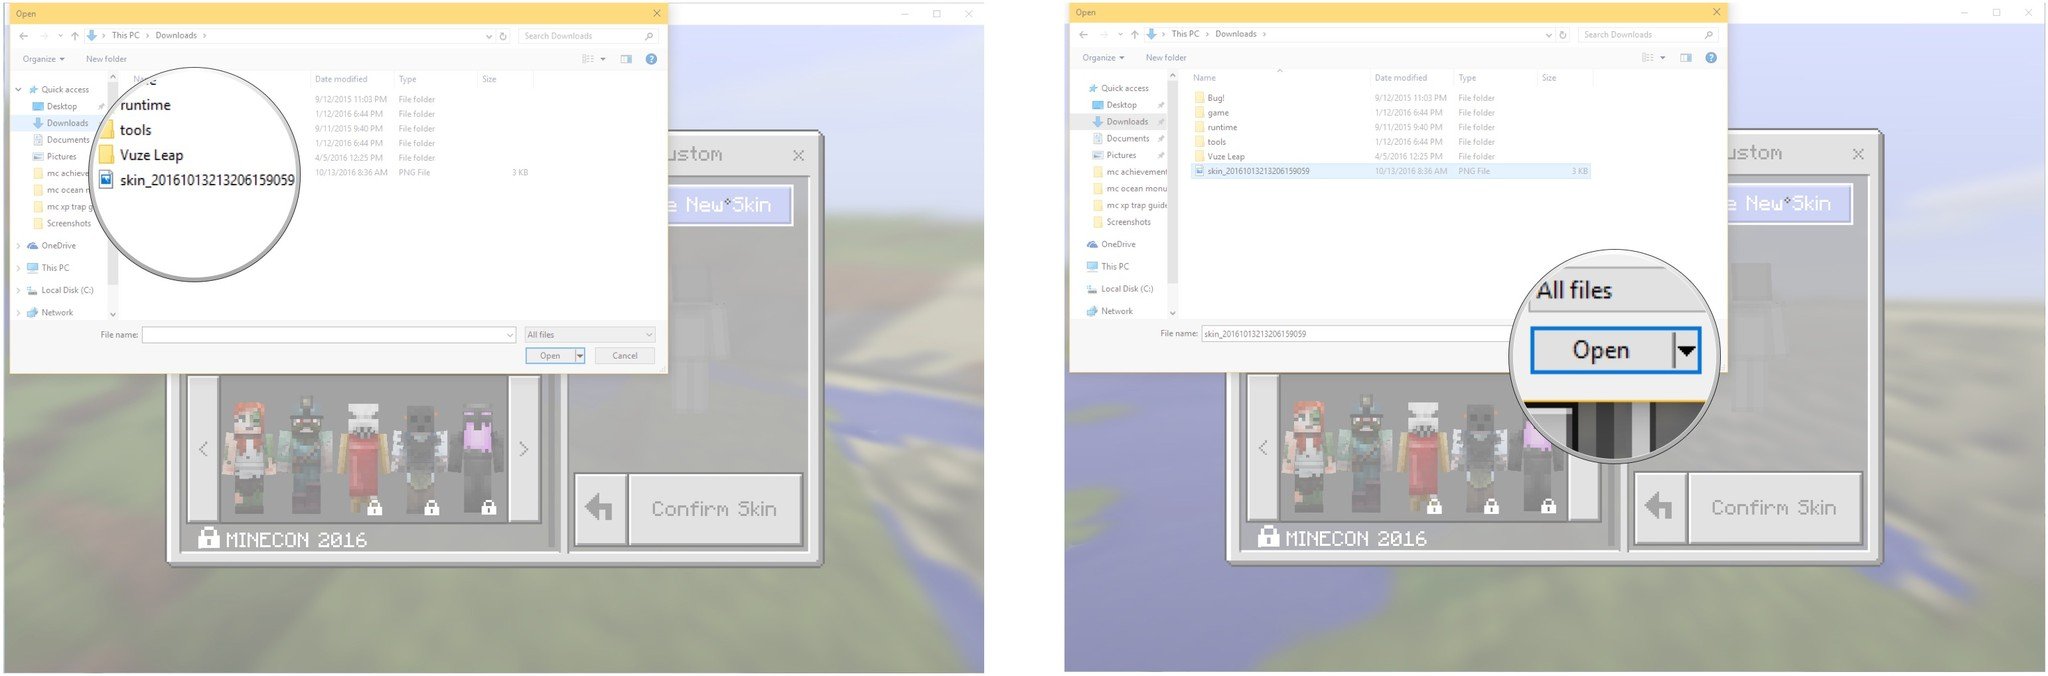
Navigate to your Downloads folder or wherever you saved your custom peel.
- Click the peel yous want to upload.
-
Click Open.
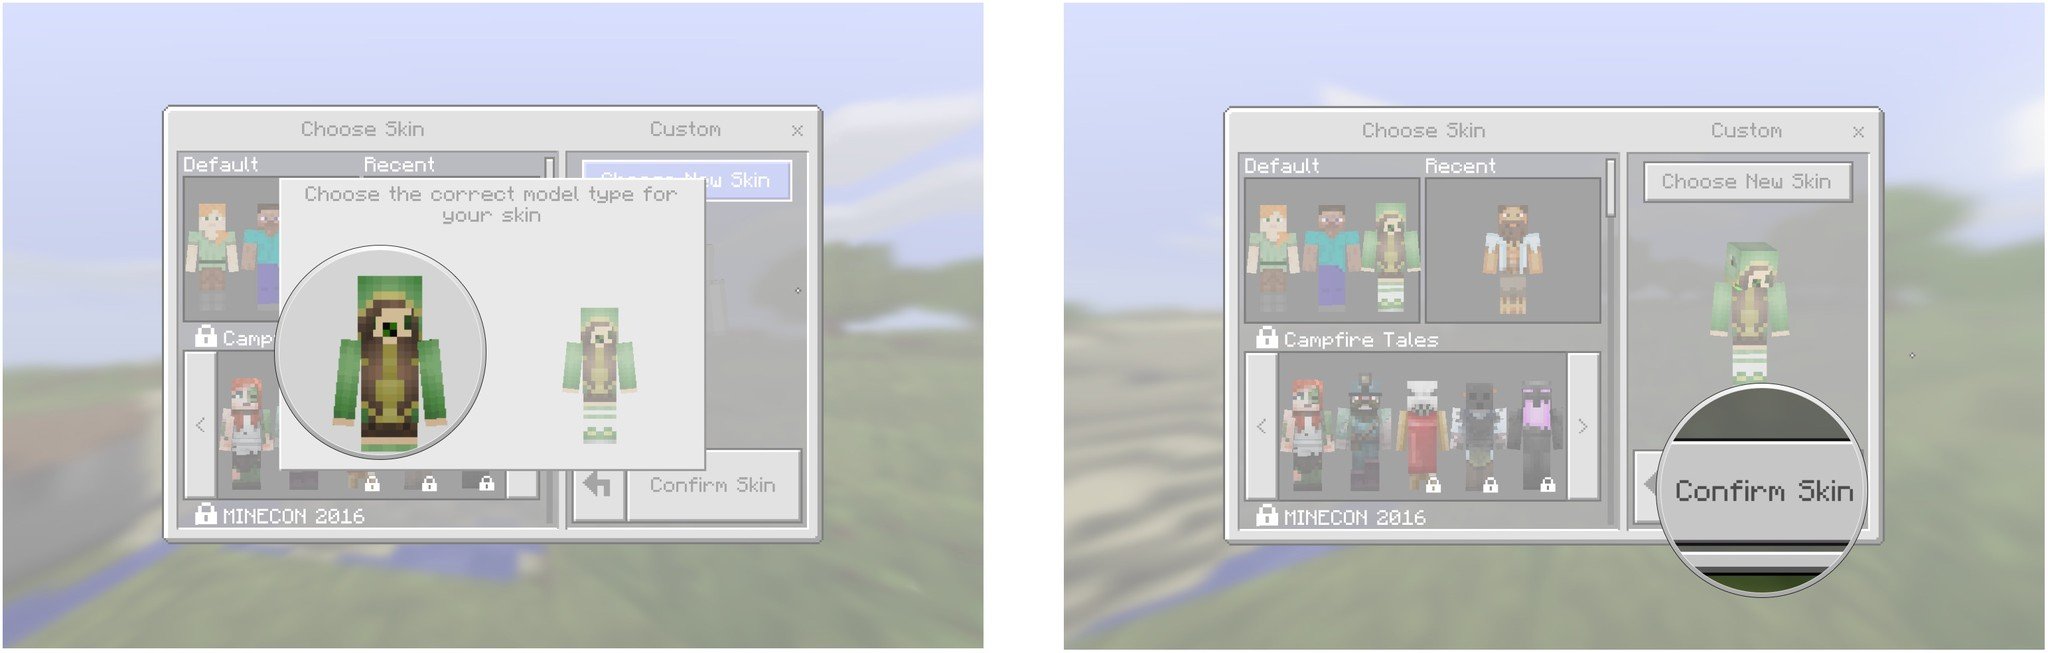
- Click the model blazon that looks all-time.
-
Click Confirm Skin.


That'due south information technology! You now have a custom peel for your Minecraft player.
Your custom skin
Do yous apply a custom skin for your player? Permit united states of america know which one in the comments department beneath!

Source: https://www.windowscentral.com/how-use-custom-player-skins-minecraft-windows-10-edition
Posted by: carterpaence.blogspot.com
0 Response to "How To Get A Custom Skin In Minecraft Windows 10"
Post a Comment